TL;DR
- Created a room mode simulator. It’s an acoustic FEM solver that runs in the browser. Users can design rooms with a block builder.
- Added an optimizer to help find the ideal subwoofer location.
- You can check it out here.

Why?
I faced a problem that many audio fans do: my listening area is oddly shaped, and I want to find the best spot for subwoofers. I used my experience to estimate based on the rectangular room mode, but I felt it could be better.
I thought it was 2025. There should be an easy room model solver for any shape, right?
Could not find one, which was surprising… A while back, I used Elmer. It has setup challenges on a Mac. I also tried Comsol, but it’s pricey and too much for what I needed. A quick search yielded lots of great open-source FEM solvers; I figured I’d try to use one of these for a quick check. Quick checks are never quick checks, but I like building things and I started digging in…
The windy road
FEM solver setup
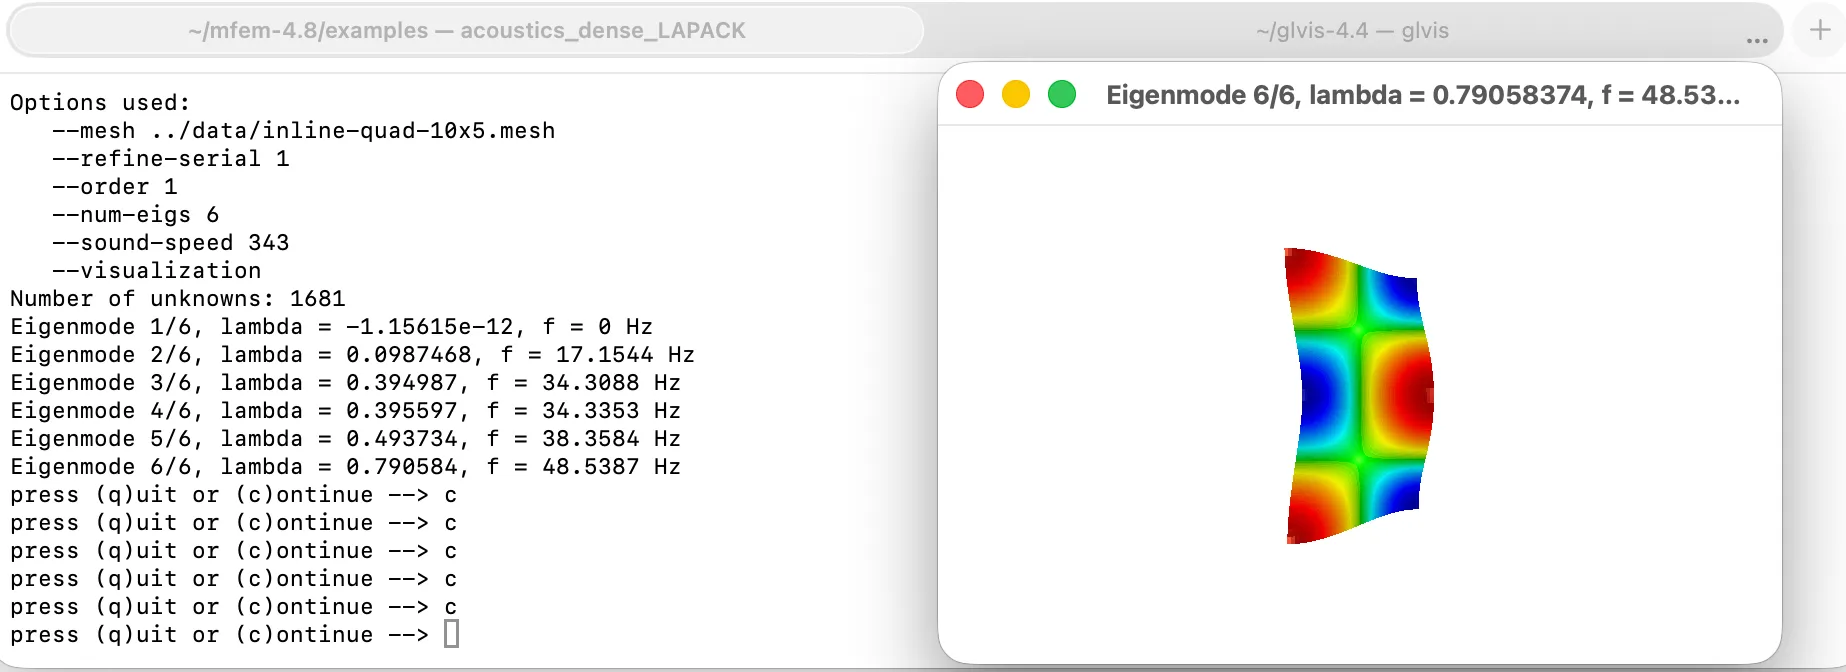
Open source solvers can manage acoustic simulations fine, like FEniCS, FreeFEM, and MFEM. They all need manual mesh and solver setup, which is fine. I chose MFEM because it has an active community. It’s portable for needed extensions and integrates like a breeze with GLVis. GLVis is a lightweight visualization tool. By default, it waits for solver output on port 19916 and then visualizes it.
The C++ tutorials and examples are clear. They helped me get the serial dense solver up and running quickly. A typical end to end workflow would look like this
- Use a CAD tool (any that can export to a standard format).
- Mesh the step file (GMSH seems to be a popular one).
- Import into MFEM to run the simulation.
- Pass to GLVis to see the results.
For complex 3D geometries, this workflow makes sense, but my geometries were simple. It’s 2025/6; can’t I do this in a browser?
FEM solver in the browser?
I figured an in-browser canvas to mesh could be one-shotted (more on that later; the punchline is yes). The neat part would be to have the fem solver running in the browser.
This process turned out to more complicated than I thought… With help from Codex and later Gemini 3 Pro, we finished it in incremental steps. Debugging compilation errors is much easier nowadays. The key pieces:
- Build a WebAssembly module that can run in the browser.
- Get MFEM & LAPACK (linear algebra package) compiled for WebAssembly use.
- This is fine for MFEM, but it is not trivial for LAPACK since it has a lot of Fortran. I switched to CLAPACK because the pieces I needed were standard. CLAPACK is an older automatic translation of LAPACK into pure C.
One limitation of the above, is that I limited the build to the serial version of MFEM, instead of the parallel version, which was fine until the mesh size started getting large, and dense solver starting exploding memory (O(n²)) & processing time (O(n³))…
The limitation with MFEM in this case is that the sparse solver only works with the parallel version. This version uses HypreLOBPCG, which relies on MPI and Hypre. I found it hard to compile for WebAssembly. AntiGravity excelled at creating a LOBPCG eigensolver. It cuts down on both memory use and time needed. The trick was to let it check its work. I set up a C++ test to compare its output with the dense solver’s output. I did this in steps with finer meshes. This approach helps catch numerical issues in the mode shape as well with smaller element size. With a target to hit, the routine was written and added as an option.
Putting it all together
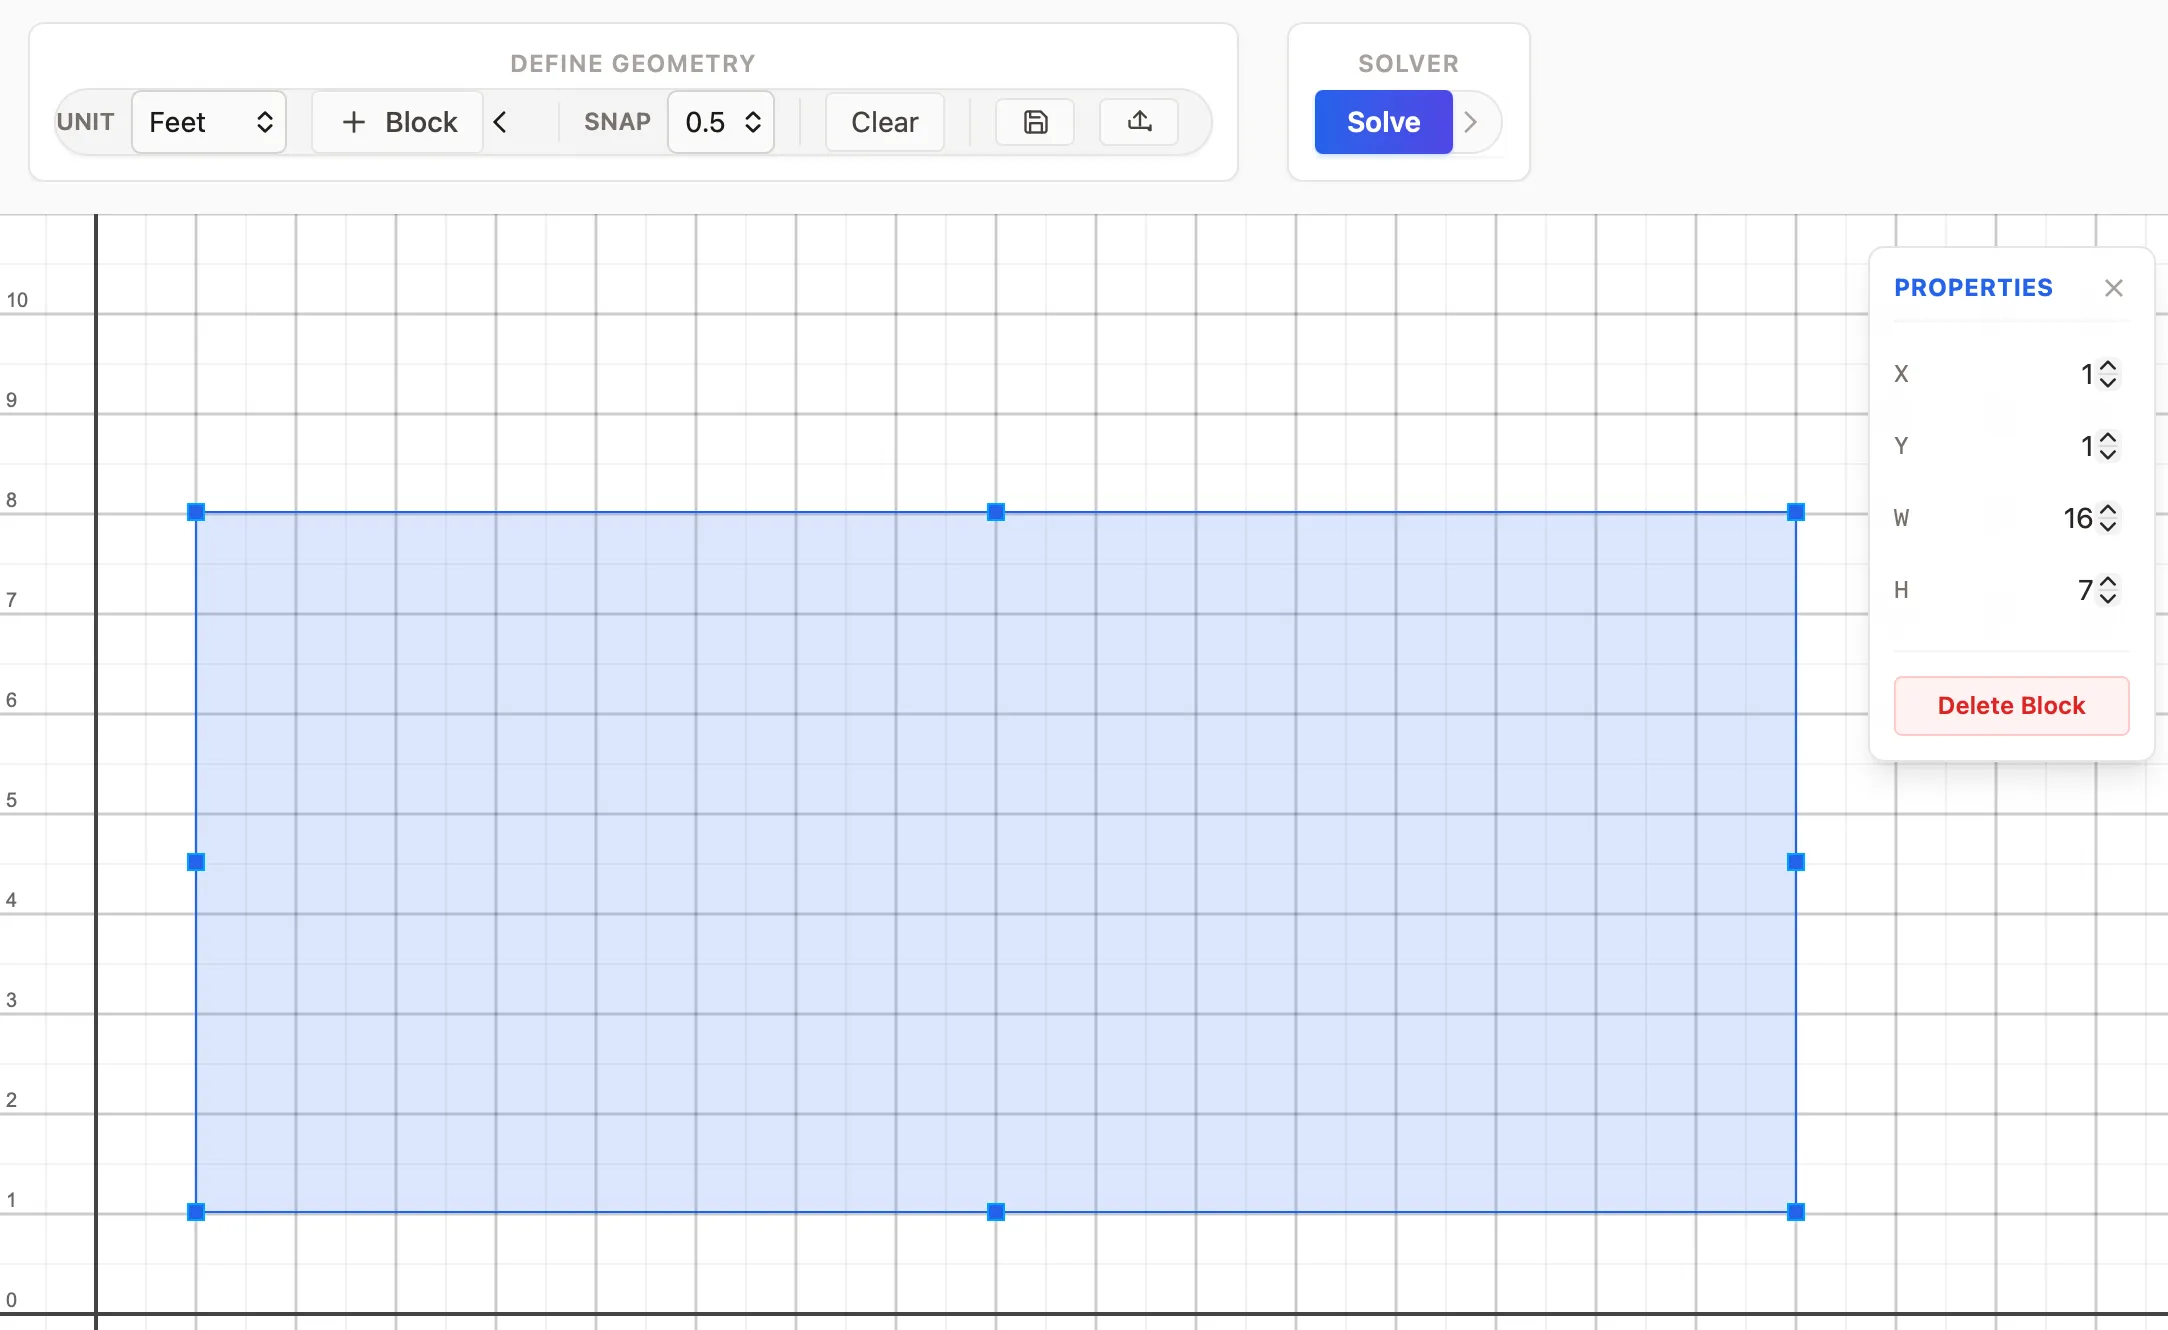
Now I have the solver and mesh input structure. I worked with AntiGravity to create a block builder interface. This helps approximate rooms. I started with basic CSS and JS, but it led to bugs over time.
Took a step back and found that having it work with abstractions was much faster and less error-prone. After a quick review of options, I chose React & Konva with react-konva. This setup ended up being pretty smooth and more polished.
A couple of other callouts along the way:
- Geometry:
- Made sure the block would snap to a specific sub-grid size. This makes placement easier.
- Added basic import/export.
- Simulation:
- I stuck to quad elements because we’re building from blocks. (Note: fem sub-routing can use triangular elements.)
- Make sure each element is smaller than 1/6 of the wavelength when meshing. This is based on the highest frequency.
- Since I had the meshing routine, I ensured the aspect ratio was no more than 1/5 given dispersion errors. These are not as critical for low frequency, but it’s good practice, so I figured why not.
So where do I put my subwoofer?
Most people have limited spots for their subwoofers. It comes down to aesthetics and practicality. Note: Good papers explain how to handle rectangular rooms. Typically for one sub, place it in the corner. For two subs, use the mid-walls for best sound consistency.
For my case, I built an optimization tool (brute force routine underneath). You can pick sub-locations, choose how many to consider, and select a listening zone to optimize for. It picks up the room modes, and computes the responses for all needed permutations. Outputs a summary table with:
- Average volume over the listening area.
- Sound consistency over the listening area.
The table is initially ranked based on sound consistency. Pick a mix that balances sound quality and volume based on your priorities.

So…?
Was it worth it? I learned a lot along the way. I had a friend looking at his speaker setup at the same time, so he learned something too. Writing this helps me reflect on the process more as well.
Did it help me? Ironically, my subwoofers were actually in a good spot for sound consistency, which I was worried about. Still, I found a couple of options for more volume; I’ll try these soon.
Other reflection? Building this in pre-agentic coding world would have been a significant endeavor, and now it’s just done… I’m still wrapping my head around the amount of software that will be produced in the next few years. There will be something for everything. Exciting times.